
If you like our work please consider becoming a Supporter and get an ad-free experience.
Main Pack Installation
To read how to install the main pack for MC1.6 and above please read our Installation Guide.Show for MC1.5 and below
- Open Minecraft and on the main screen click "Texturepacks"
- Click Open texture pack folder
- Place the texture zip in the folder that opens
- Select the pack from the Minecraft packs screen click Done and wait for the textures to load
Adding BDcraft Addons and Texture Patches
To read how to install addons and texture patches for MC1.7 and above please read our Installation Guide.Show for MC1.6 and below
- Open the texture pack with 7zip or WinRAR.
- Open the base Sphax texture pack (Left Image) and open the texture patch you want to use (Right Image).
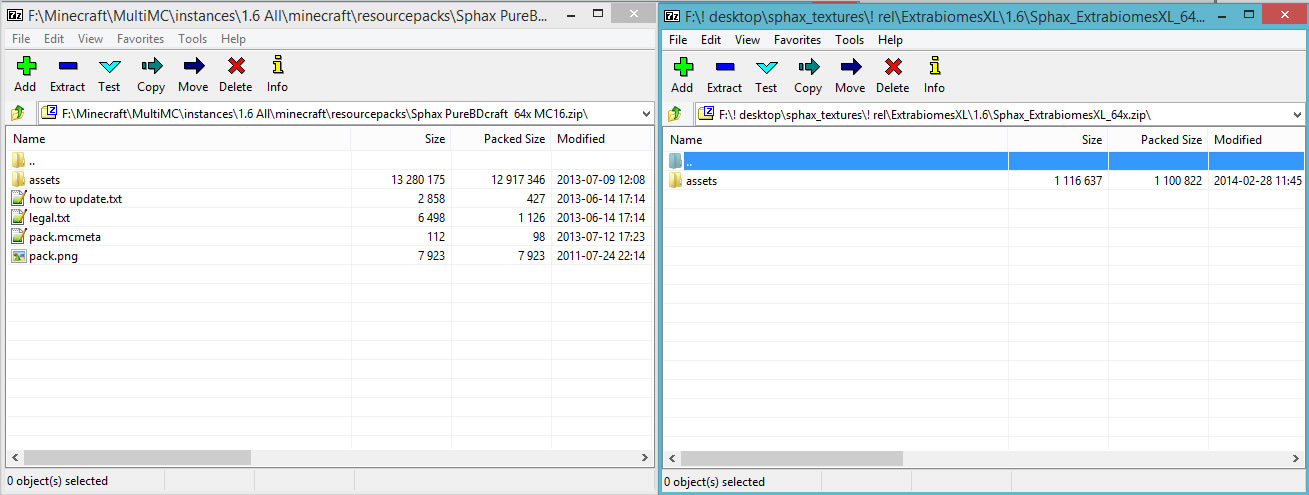
- Click inside the texture patch archive and hit Ctrl + A on your keyboard to select all the contents within the archive. Not all patches have contents beyond an assets folder in MC1.6. For those who still use MC1.5.
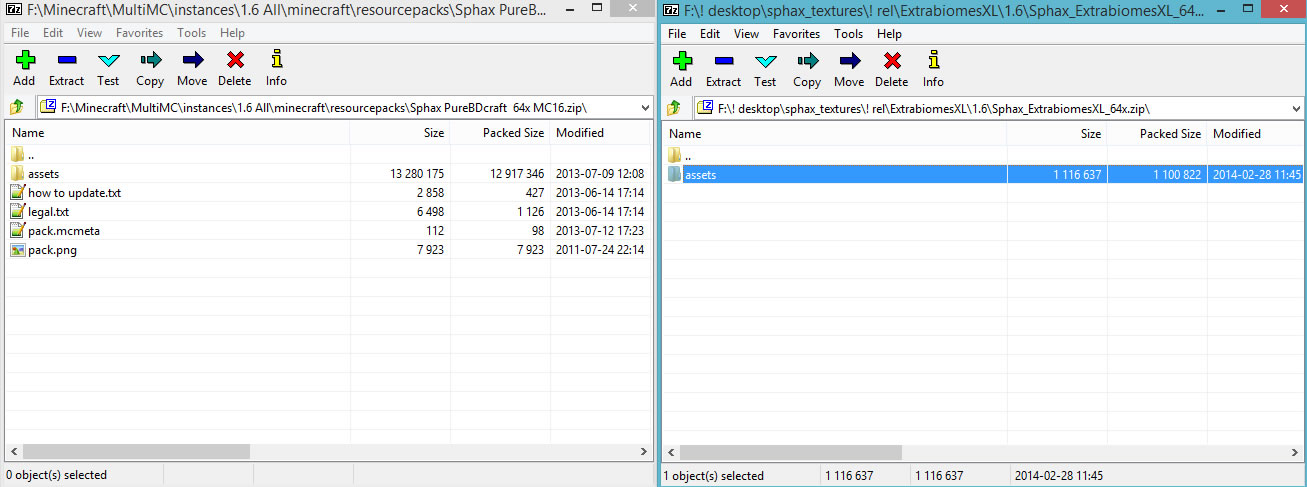
- Now click and drag one of the highlighted contents of your texture patch (in our case it's the assets folder) and drop it into the base Sphax texture archive. A confirmation similar to the one below should appear. Click Yes.
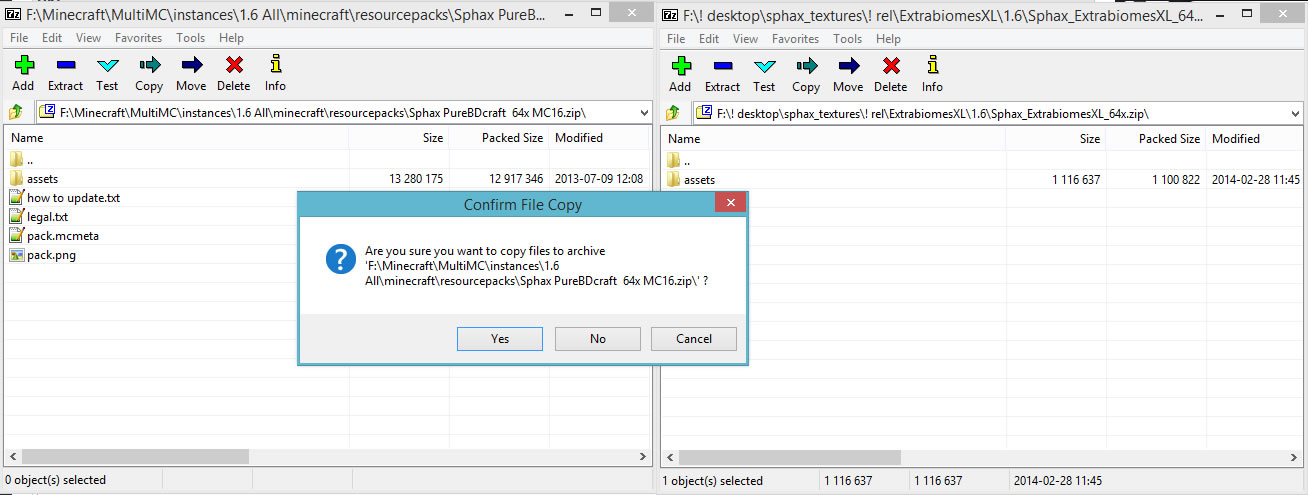
- Go ahead and confirm that the files merged, by opening up the folders that were copied and checking them against the texture patch archive. As you can see the extrabiomesxl was copied successfuly.

- Activate your texturepack as usual as described here.
Minecraft Root Directories
ShowWindows: %appdata%\.minecraft
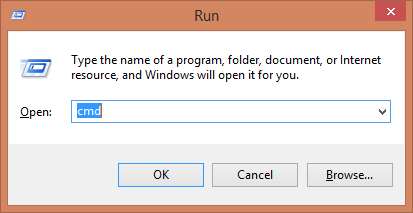
Open the run dialogue with Windows Key + R and type %appdata%\.minecraft in to the box that appears and click OK.
Mac OSX: ~/Library/Application Support/minecraft Linux: ~/.minecraft
If you're using Linux, you can usually just type this address in to your file explorer's location bar.
Open the run dialogue with Windows Key + R and type %appdata%\.minecraft in to the box that appears and click OK.
Mac OSX: ~/Library/Application Support/minecraft Linux: ~/.minecraft
If you're using Linux, you can usually just type this address in to your file explorer's location bar.
Common Problems
Show Game Crashes or Resetting to Default TexturesThere are two causes of these issues:
- You've not assigned enough RAM to Minecraft. You can see this guide for how to assign more; or
- Your graphics card can't handle the size of the texture atlas the game is trying to create. If this is the case you'll need to use lower resolution textures.
Show White or Greyed-out textures being rendered
This is caused by Minecraft running out of VideoRAM. You'll need to use lower resolution textures.
Show Low FPS / poor performance on good hardware
If you just want a pure performance boost without extra OptiFine features (like Connected Textures, RandomMobs, etc.), you can try Sodium for the Fabric Modding API instead of OptiFine.
(Note: Sodium does have plenty of complimentary addon mods to add OptiFine features, but BDcraft hasn't been verified to support them).
If you want the extra OptiFine features then install OptiFine and make sure you also enable "Smart Animations" setting in OptiFine's Performance settings and lower or disable Mipmaps.
Show Crashing with an OpenGL Error or Water disappears while using OptFine
Certain graphics cards seem to have minor issues when using OptiFine (chiefly AMD RX580s).
Usually these issues can be fixed by doing the following:
Go to Options > Video Settings > Use VBOs > OFF
Show Blocks of the same kind that appear to have different shades (e.g. Stone, Ores, Sand, etc...)
When you have MCPatcher or OptiFine installed, there's an option for "custom colours". Turning this off will prevent the same textures from getting different hues or tints on them.
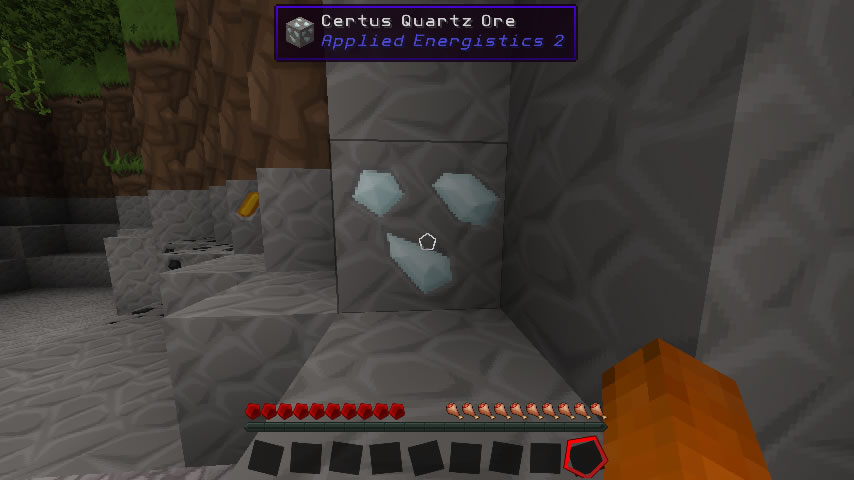
Show Items/blocks missing textures and you don't know which mod it is?
You can either use Minecraft's debug screen (F3) while looking at a block or you can use a mod that will display a tooltip similar to below:
Show Flickering Textures when using OptiFine
Go to Options > Video Settings > Performance and Turn "Fast Render" to Off. This may effect your FPS negatively.
Show Can't reset to default textures because Minecraft is crashing?
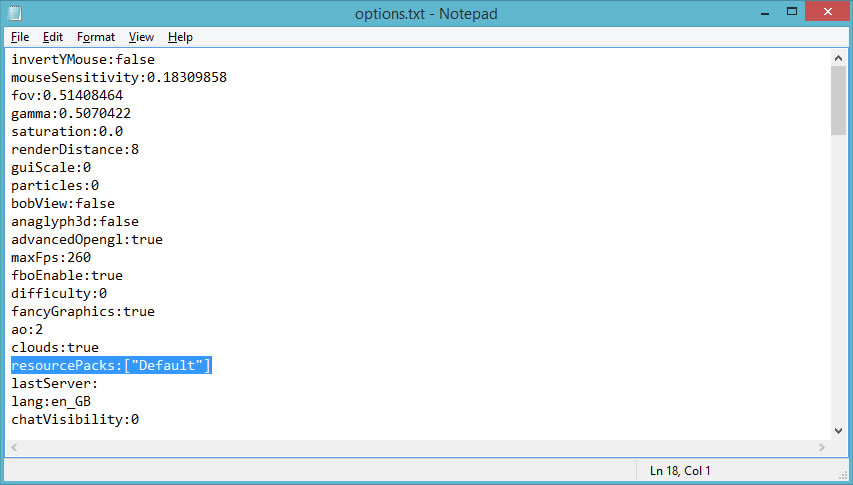
- Open up your Minecraft Directory, then open the text file named options.
- for MC1.6 and lower, the field is named skin:
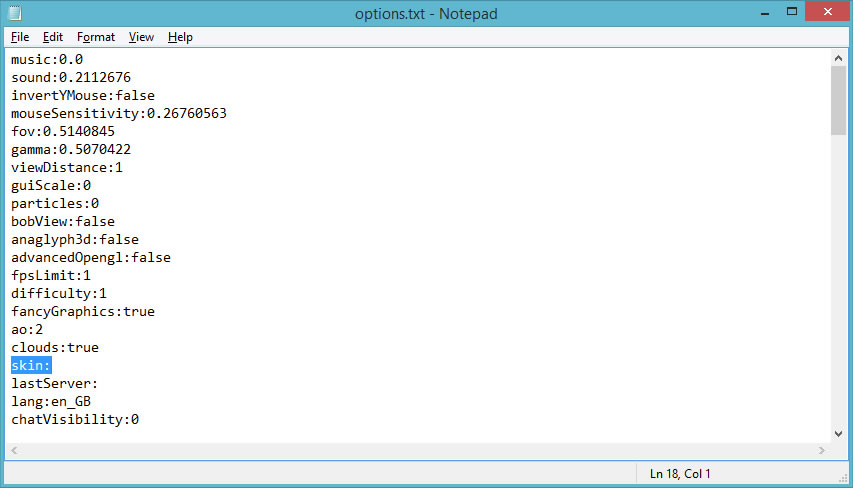
- for MC1.7 and higher, the field is named resourcePacks:
- for MC1.6 and lower, the field is named skin:
- In the images above you'll notice line 18 is the line you need to change. Make sure you copy it exactly as it is, for your version of Minecraft.
Show Getting White lines between blocks
Sometimes this is caused by Mipmaps or Anti-Aliasing in your Video Options. Try disabling them.
Nvidia users may have to do something extra!
Forced Anti-Aliasing (AA) setting and/or a forced Threaded Optimization setting for Nvidia graphics cards. Most of the time this is an OptiFine quirk because it has it's own AA and Multi-threaded optimizations, which is why it conflicts with forced NVIDIA settings.
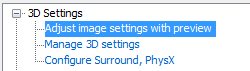
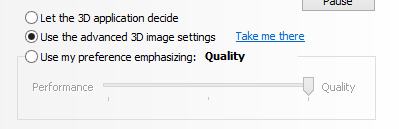
- Right click your desktop and click NVIDIA Control Panel as shown below.

- On the left pane select Adjust image settings with preview, then click Use the advanced 3D image settings. Click Apply when you've done so.
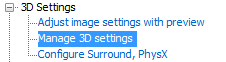
- Again, on the left pane, click Manage 3D Settings and make sure your settings match the ones in the images below. Click Apply when you've done so.

Rare Problems
Show EXCEPTION_ACCESS_VIOLATIONIf you are receiving an error similar to the one below, then you need to update your OpenAL drivers. The posts here and here should explain the details.
Code: Select all
# EXCEPTION_ACCESS_VIOLATION (0xc0000005) at pc=0x000007feea2b6220, pid=18092, tid=17464
#
# JRE version: Java(TM) SE Runtime Environment (7.0_45-b18) (build 1.7.0_45-b18)
# Java VM: Java HotSpot(TM) 64-Bit Server VM (24.45-b08 mixed mode windows-amd64 compressed oops)
# Problematic frame:
# C [OpenAL64.dll+0x6220]
Installing the Sound and Music pack on MC1.6
ShowThe music and sounds pack that are downloadable from the website are made for newer versions of Minecraft, so in order to get the packs to work on MC1.6 you need to do as such:
- Extract the sound and/or music packs zips
- Note: If you aren't installing both the sound and music packs you may not have all the folders outlined below.
- Move files from "/assets/minecraft/sounds/music/game" to "/assets/minecraft/music".
- Note: There is no menu music at all in MC1.6, so the menu folder can be deleted.
- Move files from "/assets/minecraft/sounds/music/records" to "/assets/minecraft/records".
- Rename folder "sounds" to "sound".
- Pack the new structure in to your MC1.6 resourcepack.
Thread Changelog
Show2020-07-26 22:43 BST
- Added information about Sodium FPS booster to "Low FPS when using 512x on good hardware" section
- Added "Low FPS when using 512x on good hardware" to Common Problems
- Added "Crashing with an OpenGL Error or Water disappears while using OptFine" to Common Problems
- More tidy up
- Tidied up some bits and bobs
- Added Sounds/Music pack installation for MC1.6
- Reformatted thread for new website
- Rearranged thread slightly and added the easy way to install packs
- Added note about flickering textures when using Optifine
- Fixed more images
- Fixed some images and added title change for patches to include 3D Addons
- Added newb info about base texture pack inclusion
- Added Custom Color issue to Common Problems
- Added manually "reset to default textures" info to Common Problems.
- Added a new section "Rare Problems" to facilitate the rare error with old OpenAL drivers
- Added WAILA info to Common Problems (req. by HanFox)
- Added more spacing in Common Problems
- Added another common problem
- Updated dependant sections
- Removed period from MAC root Minecraft directory (thanks to Llama Farmer)
- Fixed anchor links to use full url path (prevent page reload)
- Added "White Raster" issue to "Common Problems" (req. by HanFox).
- Added screen shot walkthrough of NVIDIA settings to help with the above issue.
- Added link to HanFox RAM tutorial in "Common Problems"
- Fixed Minecraft capitalization *coughgrammarnazihanfoxcough*
- Moved "Selecting your Texturepack in Minecraft"
- Edited description for first release
- Added more spacing between sections
- Updated dropbox link
- Added Texture Patch instructions for MC 1.7 and higher.
- Renamed "Mod Textures" to "Texture Patches"
- Added "Common Problems" section
- Added guide text file for mods/admins to negate arbitrary post updates
- Changed "Patching..." to "Adding Mods" section with 1.6 and 1.7 sub-sections
- Fixed bold text issues
- Added animated gif images to TP selection
- Made descriptions more concise in TP selection
- Added "root" to Minecraft directory heading
- Added "Selecting your Texturepack in Minecraft" section for MC 1.7 and lower
- Added this changelog
- Fixed missing description on how to drag n' drop from archive
- Changed some verbiage


